Did you just get your keys to your flat? If so, the next step is probably your renovation. With regards to plumbing work, it is possible to break down the plumbing industry into 2 different type (this is not officially recognise but those in the industry will be able to relate)
- Renovation work plumber: plumber’s in such category works with renovation firm to provide plumbing work during the renovation process.
- Repair work plumber: we can call such plumber’s post renovation plumber too as they specialise in solving plumbing problems that occur after the renovation work is done and is more likely due to wear and tear.
We at plumbersg.com specialises in plumbing repair work. Whilst we do not do much renovation plumbing work, this articles is written so as to inform you what to note during your renovation phase with regards to plumbing so as to ensure that future maintenance of your home plumbing would be easier and hopefully less costly for you.
There will be 3 topics of focus in this article and each would be written in 2 parts. For HDB owners and Private property owners:
- concealed pipes
- stop valves
- storage water heaters
1. Concealed Pipes:
Condo – In most condo, there are pipes that are running in your wall as well as above your false ceiling. While there is nothing much you can do should your pipes be in your wall, but for those above false ceiling, it is a good practice should you be buying a resale flat, to replace the pipes above your false ceiling during your renovation phase. When such work is done it is proper to check with your contractor that all the pipes are replaced not those which are easily accessible only.
We have encountered clients whom claim that the pipes have been replaced during their renovation just a year or 2 back. However upon further checking we realise that the pipes replaced are only those which are easier to do / access. This resulted in the false ceiling being cut open again (which causes a lot of mess).
HDB – For HDB resale flats, the conceal pipe we are talking about would usually only involve the pipes which are running behind your kitchen cabinet. This is crucial for any would be home owner as if any such pipes leaks would probably mean cutting up or dismantling of cabinet in order to access the pipe (such work are usually considered major). A small tip we can advice here is to have a portion of pipe exposed before going into the cabinet. See picture below: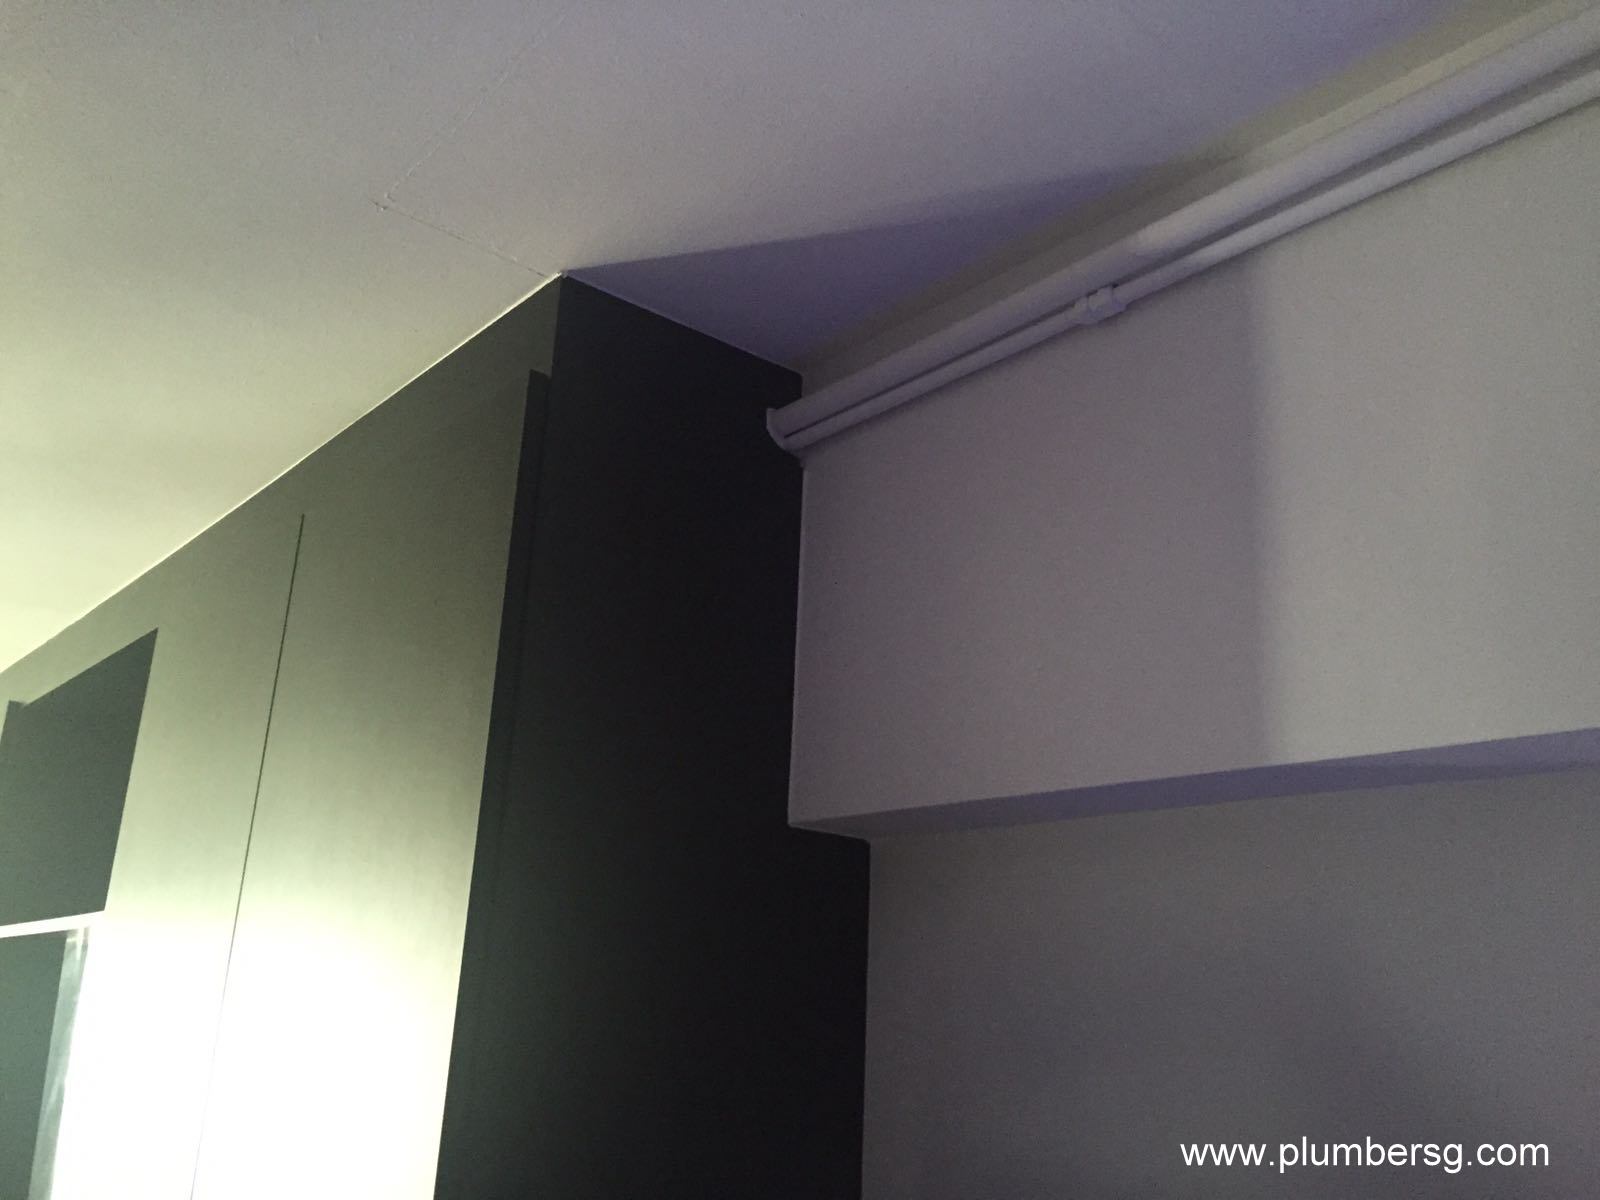
As you can see certain portion of the pipe is exposed before going into the cabinet. By having such pipes exposed, should the internal hidden pipes start to leak, you can bypass them in the future by tapping onto the exposed pipe.
For BTO or newer flats, most pipes are in the walls and as such there is not much work you can do with them during your renovation phase.
2. Stop Valves
Also known as stop cock, valves, mini ball valves etc. This is a crucial component in your pipe work. What they do is help stop the water supply to certain portion of you homes. As such if you have them properly installed in your home, should a pipe or tap burst, you can isolate the problem without switching off your main water supply and thus cutting water supplies to your home. The image below shows how a stop valve should look like in your home.

Where they should be placed: ideal places to be placed depends on how the pipes are running in your home but typically they should be near your water outlets (Tap) point so as to help you in the case of tap burst. Using this theory you can formulate where the valve should be. For example:
case study 1 – the pipes of both toilet shares 1 water inlet point. You can have a valve before the pipe runs to the 2nd toilet so that should any issue occur in your 2nd toilet, your 1st toilet would still have water supply.
case study 2 – the main water inlet pipe splits into 2 by using a T-joint. 1 pipe line leads to the toilet and 1 to the kitchen. As such you should have your valve for both point to isolate them in the event of a pipe burst in either.
Also do remember your toilet bowl (they are considered a water outlet point too). There must be a stop valve next to the toilet bowl water supply.
3. Storage Water Heater:
Condo – most condo have their storage heater above the false ceiling. During your renovation planning it is essential to consider that your heater would have to be replaced at some point in the future (usually within the next 5-10 years). As such it is important to plan for the time when such work has to be done. In your plans do consider if there is enough space for the heater to be removed, if there are other pipes such as sewage pipe blocking the access of the heater. Do remember it is easy to install the heater before the false ceiling is done as there are loads of space but once the false ceiling is done, the space above it is extremely limited.
Beside that do note that all storage heater do have a pressure release valve which is a safety feature that is essential. The pressure release valve do release hot water from the tank in the event that the pressure in the tank is too high. We have seen renovation contractor that either plug up the release valve or link the release valve to a fake drainage point. Here is how you can check on this issue:
- most release valve have a manual release lever.
- turn on the lever and water should flow our from the tank out of the valve.
- most condo unit would have pipe from such outlet leading to the drainage point.
- physically hear the sound of the water flowing into a pipe and down into your floortrap below.
- open your floor trap there should be signs of water flowing. This is crucial as we have encounter pipes that flows into a dead end and not into the floor trap.
With the 3 points mentioned above, we hope that by practising such good practice to your plumbing work, you would be able to save time and money in the future.